How to Use Cricut Hat Press? [step-by-step]
![How to Use Cricut Hat Press? [step-by-step]](https://cricuts-mart.com/upload/blog/658199fbb41decricuts-mart.webp)
For me, Cricut Hat Press is a great and easy-to-use crafting tool that I use for most of my projects. With the help of this machine, I have created numerous amazing products. Plus, I use Cricut Hat Press for my crafting works, but I have also used it to make custom hats for my online business. Other than that, I think this is the best machine to start your crafting journey.

If you are also new to this machine and want to start your Cricut journey, then I am here to help you. In this blog, I will give you an in-depth look at how to use Cricut Hat Press and the supplies you require for your project. So, keep reading this blog till the end to start creating your first project.
How to Setup Cricut Heat Press on Your Device?
Before I tell you how to use Cricut Hat Press, you must understand the process to set up the machine for you. Here are simple steps you can follow to connect the machine with the Cricut Heat app.
- Firstly, unbox the machine and plug its cable into a power source.
- Then press the temperature button on the press to power it on.
- After that, open the respective app store on your Android/iOS device and download the Cricut Heat app.
- Next, if you have an existing Cricut account, then sign in to the app; otherwise, create a new account.
- Make sure to keep the Hat Press machine and device with the app within 7 feet to complete the Bluetooth pairing automatically.
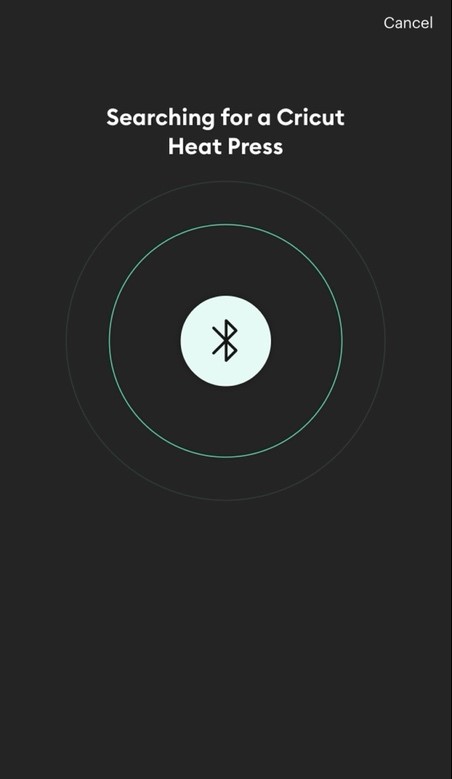
- Afterward, tap on Set Up to start machine activation.
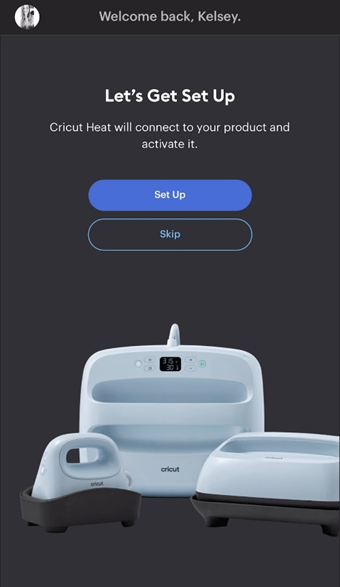
- Once your Cricut Hat Press machine shows up on the display, tap on the Connect option.
- ‘Connecting to Hat Press’ notification will appear on the screen when the connection process is complete.
What Are the Basic Supplies to Make a Project on Cricut Hat Press?
Knowing what supplies you need to create a product is as important as how to use Cricut Hat Press. Here are some supplies you need if you want to create a product with the machine.
- Cricut Hat Press
- Cricut Heat app
- Blank Cricut baseball cap
- Heat-resistant tape.
- Infusible ink transfer sheets
- Iron on vinyl
- Butcher paper
- Lint roller
- Materials, and others.
Also, keep in mind that the supplies can vary depending on the product and project you choose to create. However, these are the basic supplies you must have to work on any product.
How to Use Cricut Hat Press for Creating Your First Project?
Here I will explain to you the process to create a hat project Infusible Ink transfer sheet. So, follow this step-by-step guide to make your first project with the machine.
- Initially, open the Cricut Design Space app and create/insert an image below 2.25 inches tall by 4.25 inches wide. I am using this “hot mess express” text.
- Once the design is complete, select the mirroring option before cutting the materials.
- After that, stick the Infusible Ink transfer sheets on the Cricut mat and load it in any cutting machine. (I am using the Cricut Explore 3 to cut the design).
- Once the cut is complete, cut the transfer sheet and remove the excessive part.
- After that, turn on the Cricut Hat Press machine and open the app.
- On the app, choose the Infusible Ink transfer sheet to Transfer Material. Also, choose and select Trucker Hat for “Applied To.”

- In the following step, tap on the Next option.
- Now, start preparing the hat by pressing the sweatband and attaching it to the trucker hat.

- Afterward, with the help of the lint roller, clean the hat’s part where you want to stick the design.

- Preheat the hat by keeping the press on for 5 seconds and then press the Go (triangle) button.
- Next, keep the Infusible Ink or iron-on image and butcher paper on the hat.

- Then, apply the heat on the required surface for 60 or 90 seconds according to the timer.

- In the next step, remove the butcher paper from the hat.

- Whoa, your first hat project is complete!
Frequently Asked Questions
Q.1 How to Use Cricut Hat Press to Make a DIY Project?
Here are the steps you have to follow to create a DIY product.
- First, you have to set up the machine on your phone via the Cricut Heat app.
- On the Design Space app, create your device and cut it with any Cricut cutting machine.
- Remove the unwanted from the design when the cut is complete.
- Prepare the Cricut Hat Press machine and choose the materials on the app.
- Then, keep the design and the butcher paper on the hat product. Make sure to insert them onto the trucker hat.
- Also, place the butcher paper on top of the design.
- When the Hat Press reaches the right temperature, apply the heat on the design for 60 to 90 seconds.
- Finally, the design will be complete.
Q.2 What Products Do I Need to Create Crafts on Cricut Hat Press?
The basic supplies requirements to create the DIY hat on the Cricut Hat Press machine are as follows. However, the supplies can vary from project to project.
● Cricut Hat Press
● Cricut cutting machine
● Blank Cricut baseball cap
● Cricut Heat App
● Transfer Tape
● Butcher paper
● Lint roller
● Infusible ink transfer sheets, and others.
Q.3 Can I Use Cricut Hat Press for Projects Other than Hats?
Of course, you can use the Cricut Hat Press for double duty. Well, the machine is specially designed to work with the hat crafts, but that does not mean you can not create other projects with that. I personally use this machine for other products when I have to create designs for small projects on curved shapes. So, before you use it for your project, check if it completely fits the project or not.
Visit: Install cricut design space app
Source: https://cricuts-mart.com/how-to-use-cricut-hat-press-step-by-step

Comments
Post a Comment